Arbitrum Stylus Plugin
Arbitrum Stylus Plugin is the optimal solution for deploying smart contracts written in languages like Rust through Arbitrum Stylus in Remix IDE. As long as you write your smart contract in a language that can be compiled to WASM, you will be able to compile, deploy, activate, and even directly execute the contract using Stylus.
To use this plugin, Please visit the Remix IDE and follow the guide below or use this direct link
Step 1: Click the Plugin Manager button in the left bar.
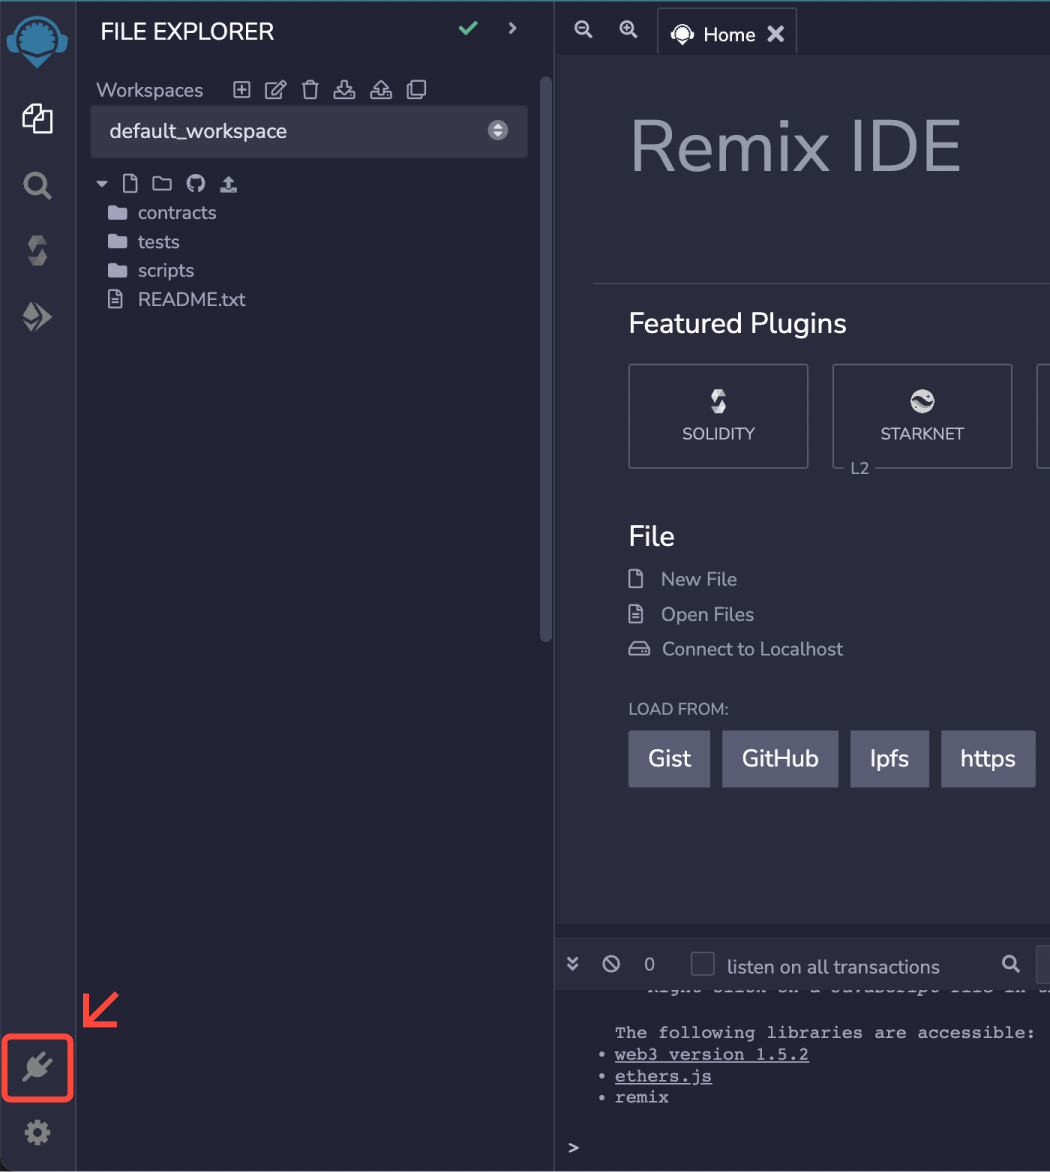
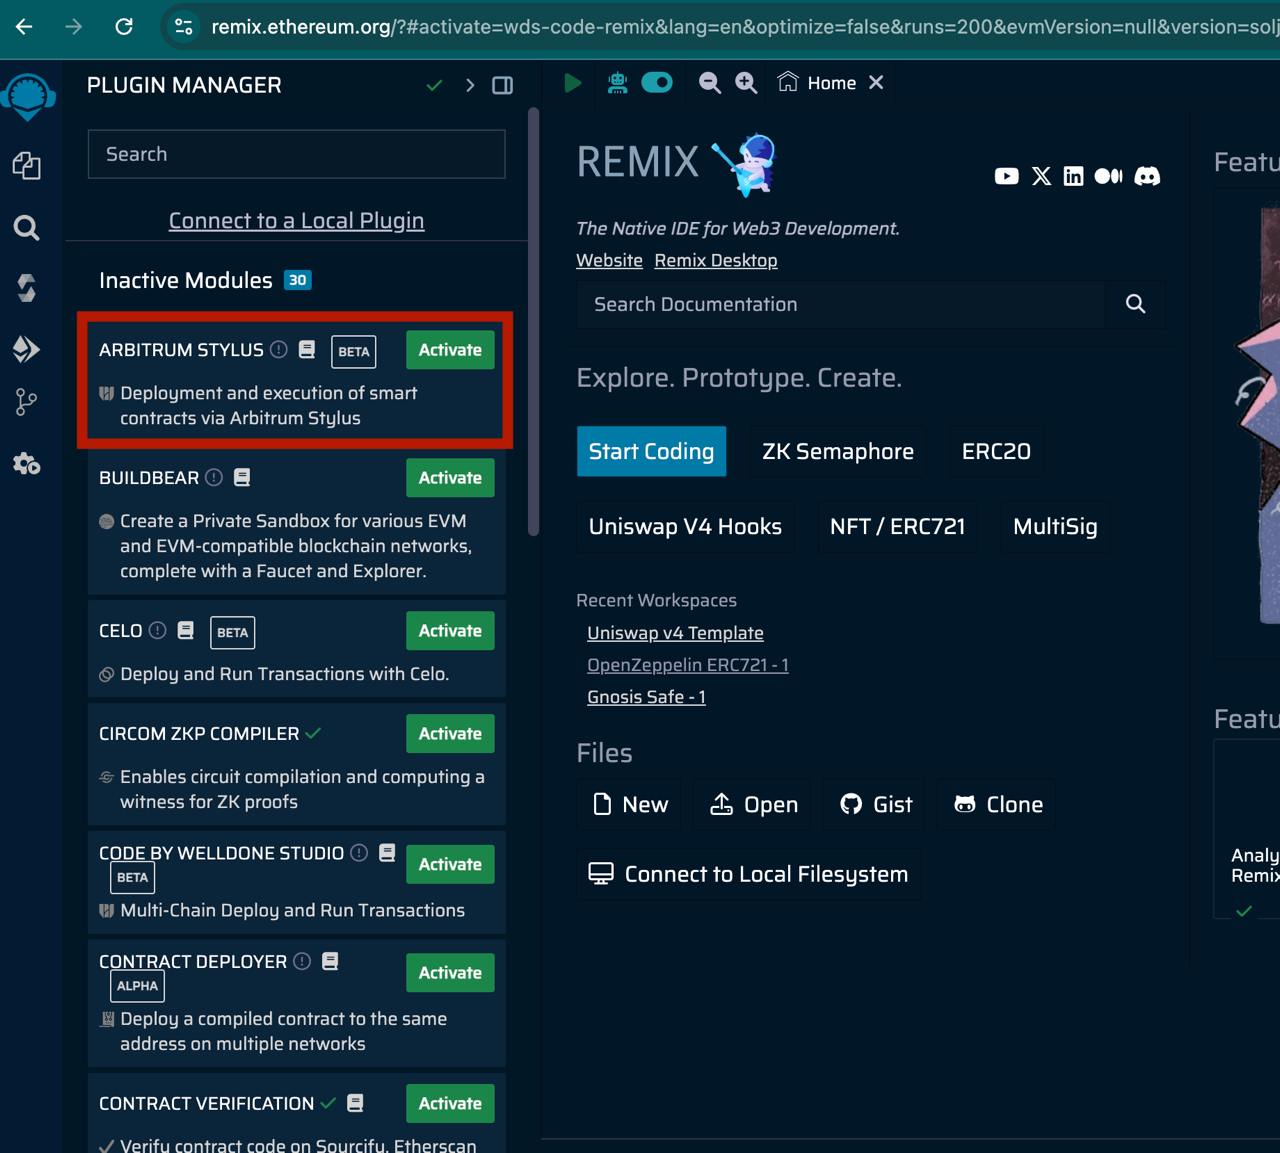
Step 2: Search for Arbitrum Stylus Plugin and click the Activate button.
Once the plugin has been successfully added, you can run Arbitrum Stylus Plugin by clicking the icon in the left bar.
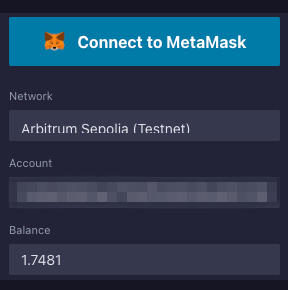
Connect to Wallet
Once you access the plugin, your wallet address and balance will be automatically retrieved through MetaMask, connected to the Arbitrum network. If MetaMask is not connected to the Arbitrum network, it will automatically switch to the mainnet. If the mainnet information is not available, it will be added automatically.
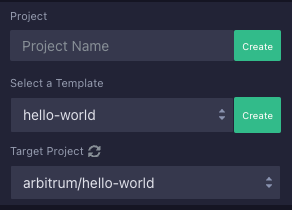
Create the Project
In Arbitrum Stylus, you can write smart contracts in the Rust language. Arbitrum Stylus Plugin provides two features to assist developers new to Stylus.
Create Template
Create a simple example contract code written in Rust. You can generate a sample contract by selecting the template option and clicking the Create button. More templates are available at Stylus Samples.
New Project
Automatically generate a contract structure. Click the Create button to generate a contract structure.
You can create your own contract projects without using the features above. However, for the Remix plugin to build and deploy the contract, it must be created within the arbitrum/ directory. If you start a new project, the structure should look like the following:
arbitrum
└── <YOUR_PROJECT_NAME>
    ├── Cargo.toml
    └── src
        └── contract.rs
    └── examples
        └── schema.rs
Compile the Contract
Currently, we only support the AMD compilation server. The build environment is essential for contract verification due to the non-deterministic nature of compiling Rust into Wasm.
Step 1: Select the project you want to compile in the TARGET PROJECT section.
Step 2: Choose a compilation option and click the Compile button.
Step 3: Once the compilation is complete, the deployment_tx_data.txt and ABI files will be returned.
Deploy the Contract
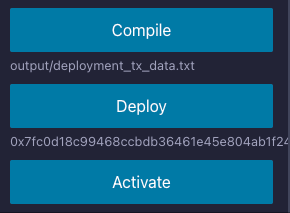
Step 1: Once the contract is successfully compiled, a Deploy button will appear below the Compile button. Click the Deploy button to deploy your contract.
Step 2: After a successful deployment, the contract address will be displayed below the button, allowing you to check the deployed contract on an explorer.
Step 3: If activation is required, an Activate button will appear.
When is Deployment Needed?
- New Contracts: When deploying a new smart contract to the blockchain for the first time.
- Contract Updates: When changing the core logic or adding new functionalities to the smart contract, a new version needs to be deployed.
Activate the Contract
The activation step ensures that the deployed contract is fully operational and ready to interact with on the Arbitrum network. This step verifies that the contract is ready for actual use.
When is Activation Needed?
- Post-Deployment: After deploying the contract, activation ensures the contract is recognized by the network and fully functional.
- Re-Deployments: When redeploying an updated version of the contract, activation ensures that the new version is properly initialized and functional.
Execute the Contract
Step 1: You can interact with the deployed smart contract through the Contracts section in the Remix IDE plugin.
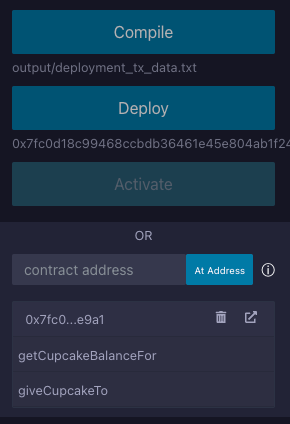
Step 2: After deployment or activation is complete, an interaction tab will be generated in the Contracts section, where you can view all the contracts you have deployed.
Step 3: Alternatively, you can manually register the contract by entering the address and ABI directly.
Step 4: Select the desired contract to interact with. The most recently deployed contract address will be shown below the deploy button, helping you find the corresponding contract tab for interaction.
Step 5: The contract's list of functions will be displayed, allowing you to input values and invoke the functions as needed.
Related
- For more information on how to use Remix IDE, see Remix IDE Official Docs.