Standard Account

Introduction
In the Aptos blockchain, the account model is a key element for managing users' digital assets and smart contracts. There are three types of accounts in Aptos: standard accounts with typical key pairs, resource accounts which are standalone accounts without private keys used by developers, and objects which are complex sets of resources stored at a single address. Each of these types of accounts has its unique characteristics and use cases. In this article, we will primarily discuss the special features of the Standard Account.
- Basic understanding of blockchain ecosystem.
Standard Account
Account Creation and Management
In the Aptos blockchain, the state of each account is composed of two main elements: Move modules and Move resources.
- Move Modules: These include code, such as declarations of types or procedures, but do not contain data. Move modules define the rules for updating the global state of the Aptos blockchain.
- Move Resources: On the other hand, Move resources contain data but no code. Each value of Move resources is of a type declared in some module published on the Aptos blockchain.
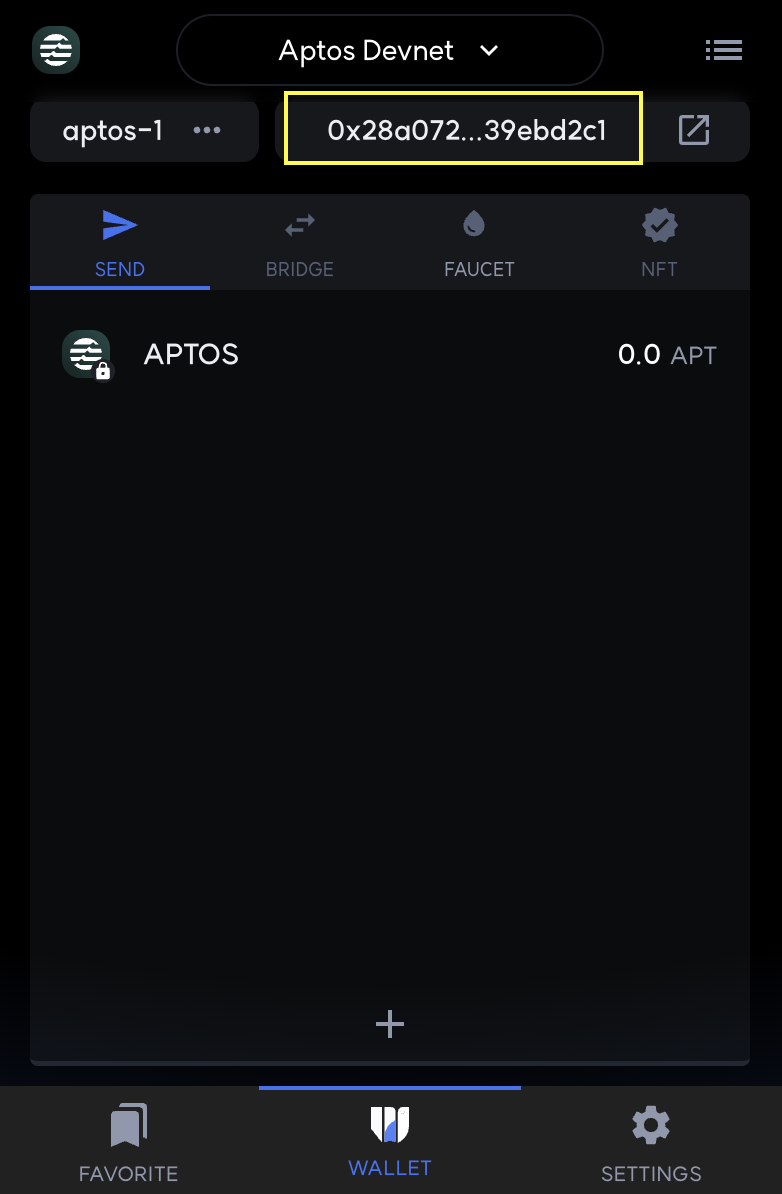
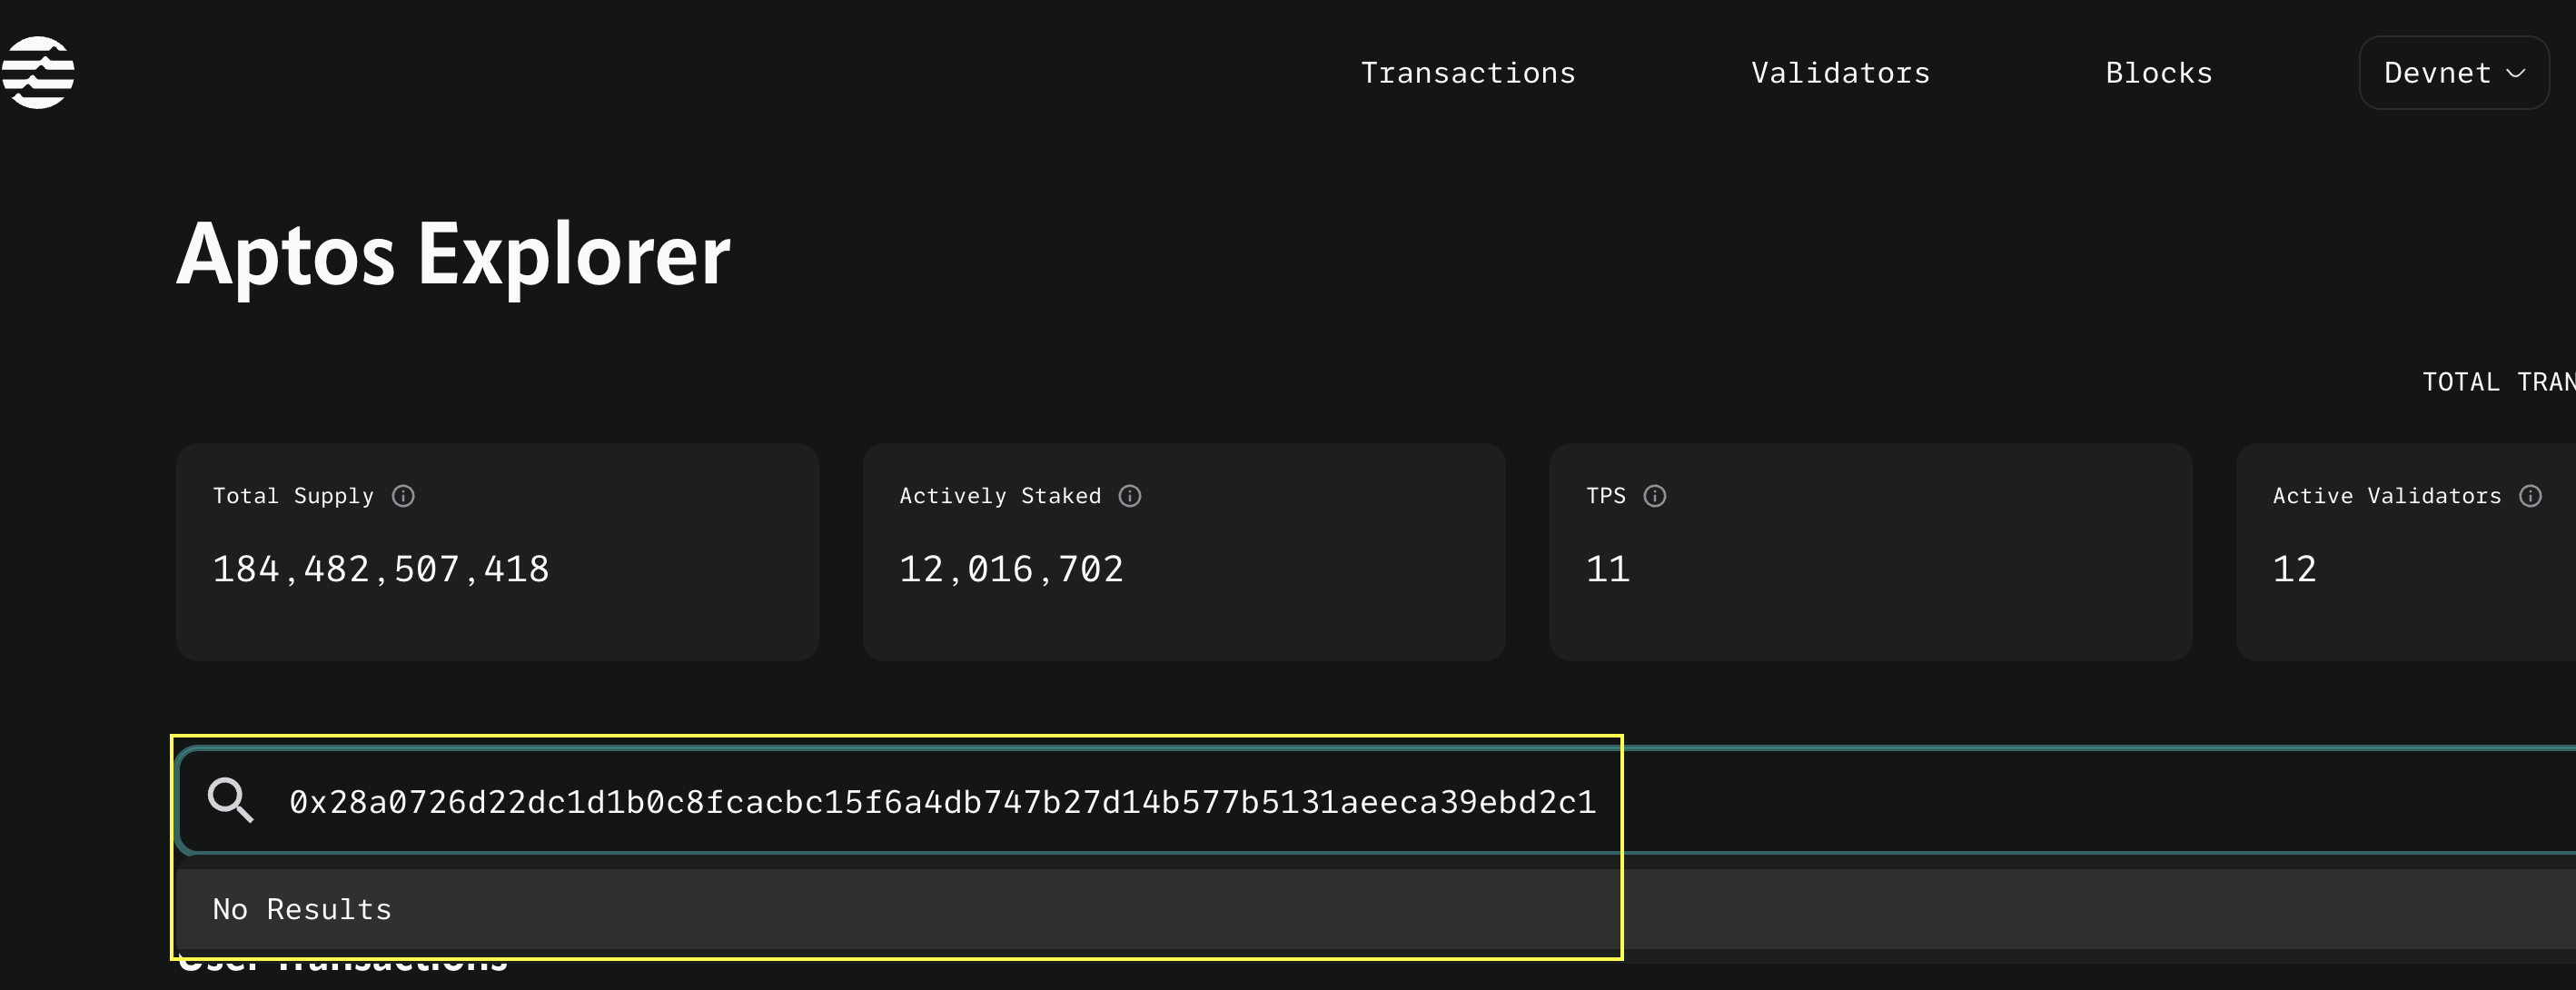
Accounts in Aptos are created on-chain, and users can create new accounts through wallets. However, actual activation on-chain requires a separate transaction. As seen in the images below, an account is created in the wallet, but it is not found in the explorer.
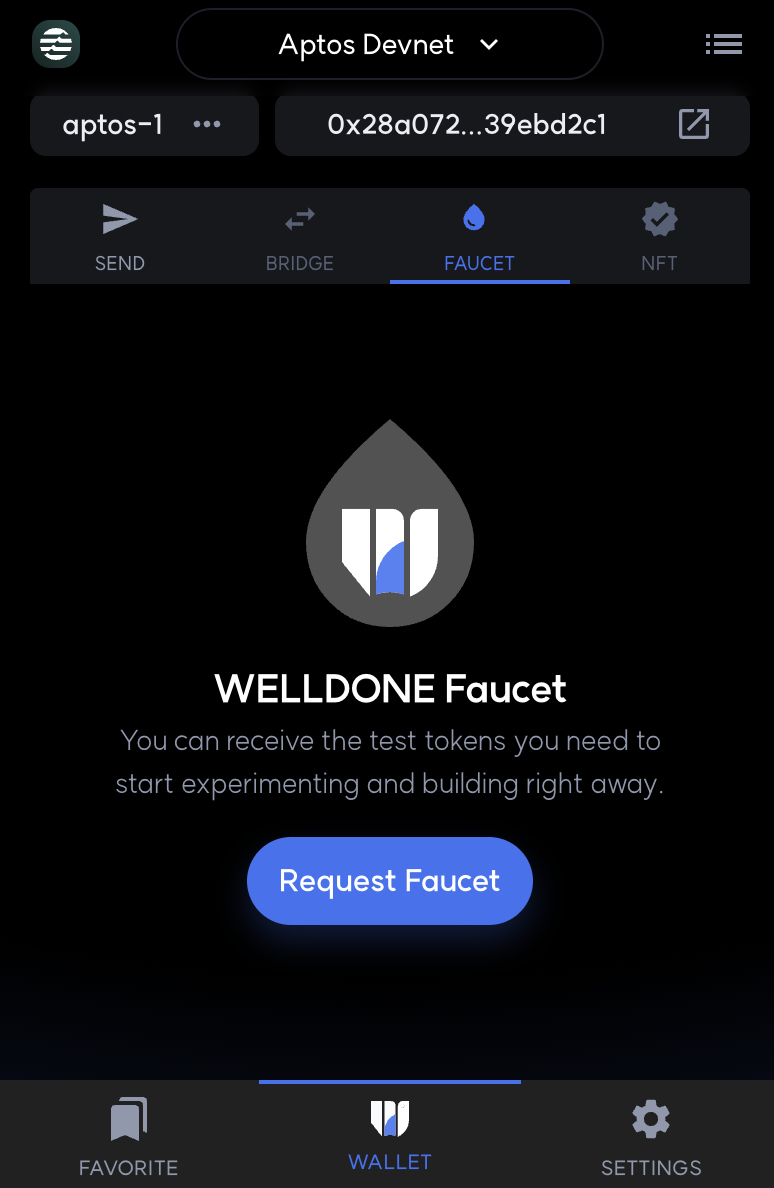
Here, we use a faucet for account activation. This allows users to activate their accounts on-chain and start transactions on the actual Aptos network. The Aptos official documentation describes this as follows:
The Aptos framework supports implicitly creating accounts when transferring Aptos coin via aptos_account::transfer or explicitly via aptos_account::create_account.
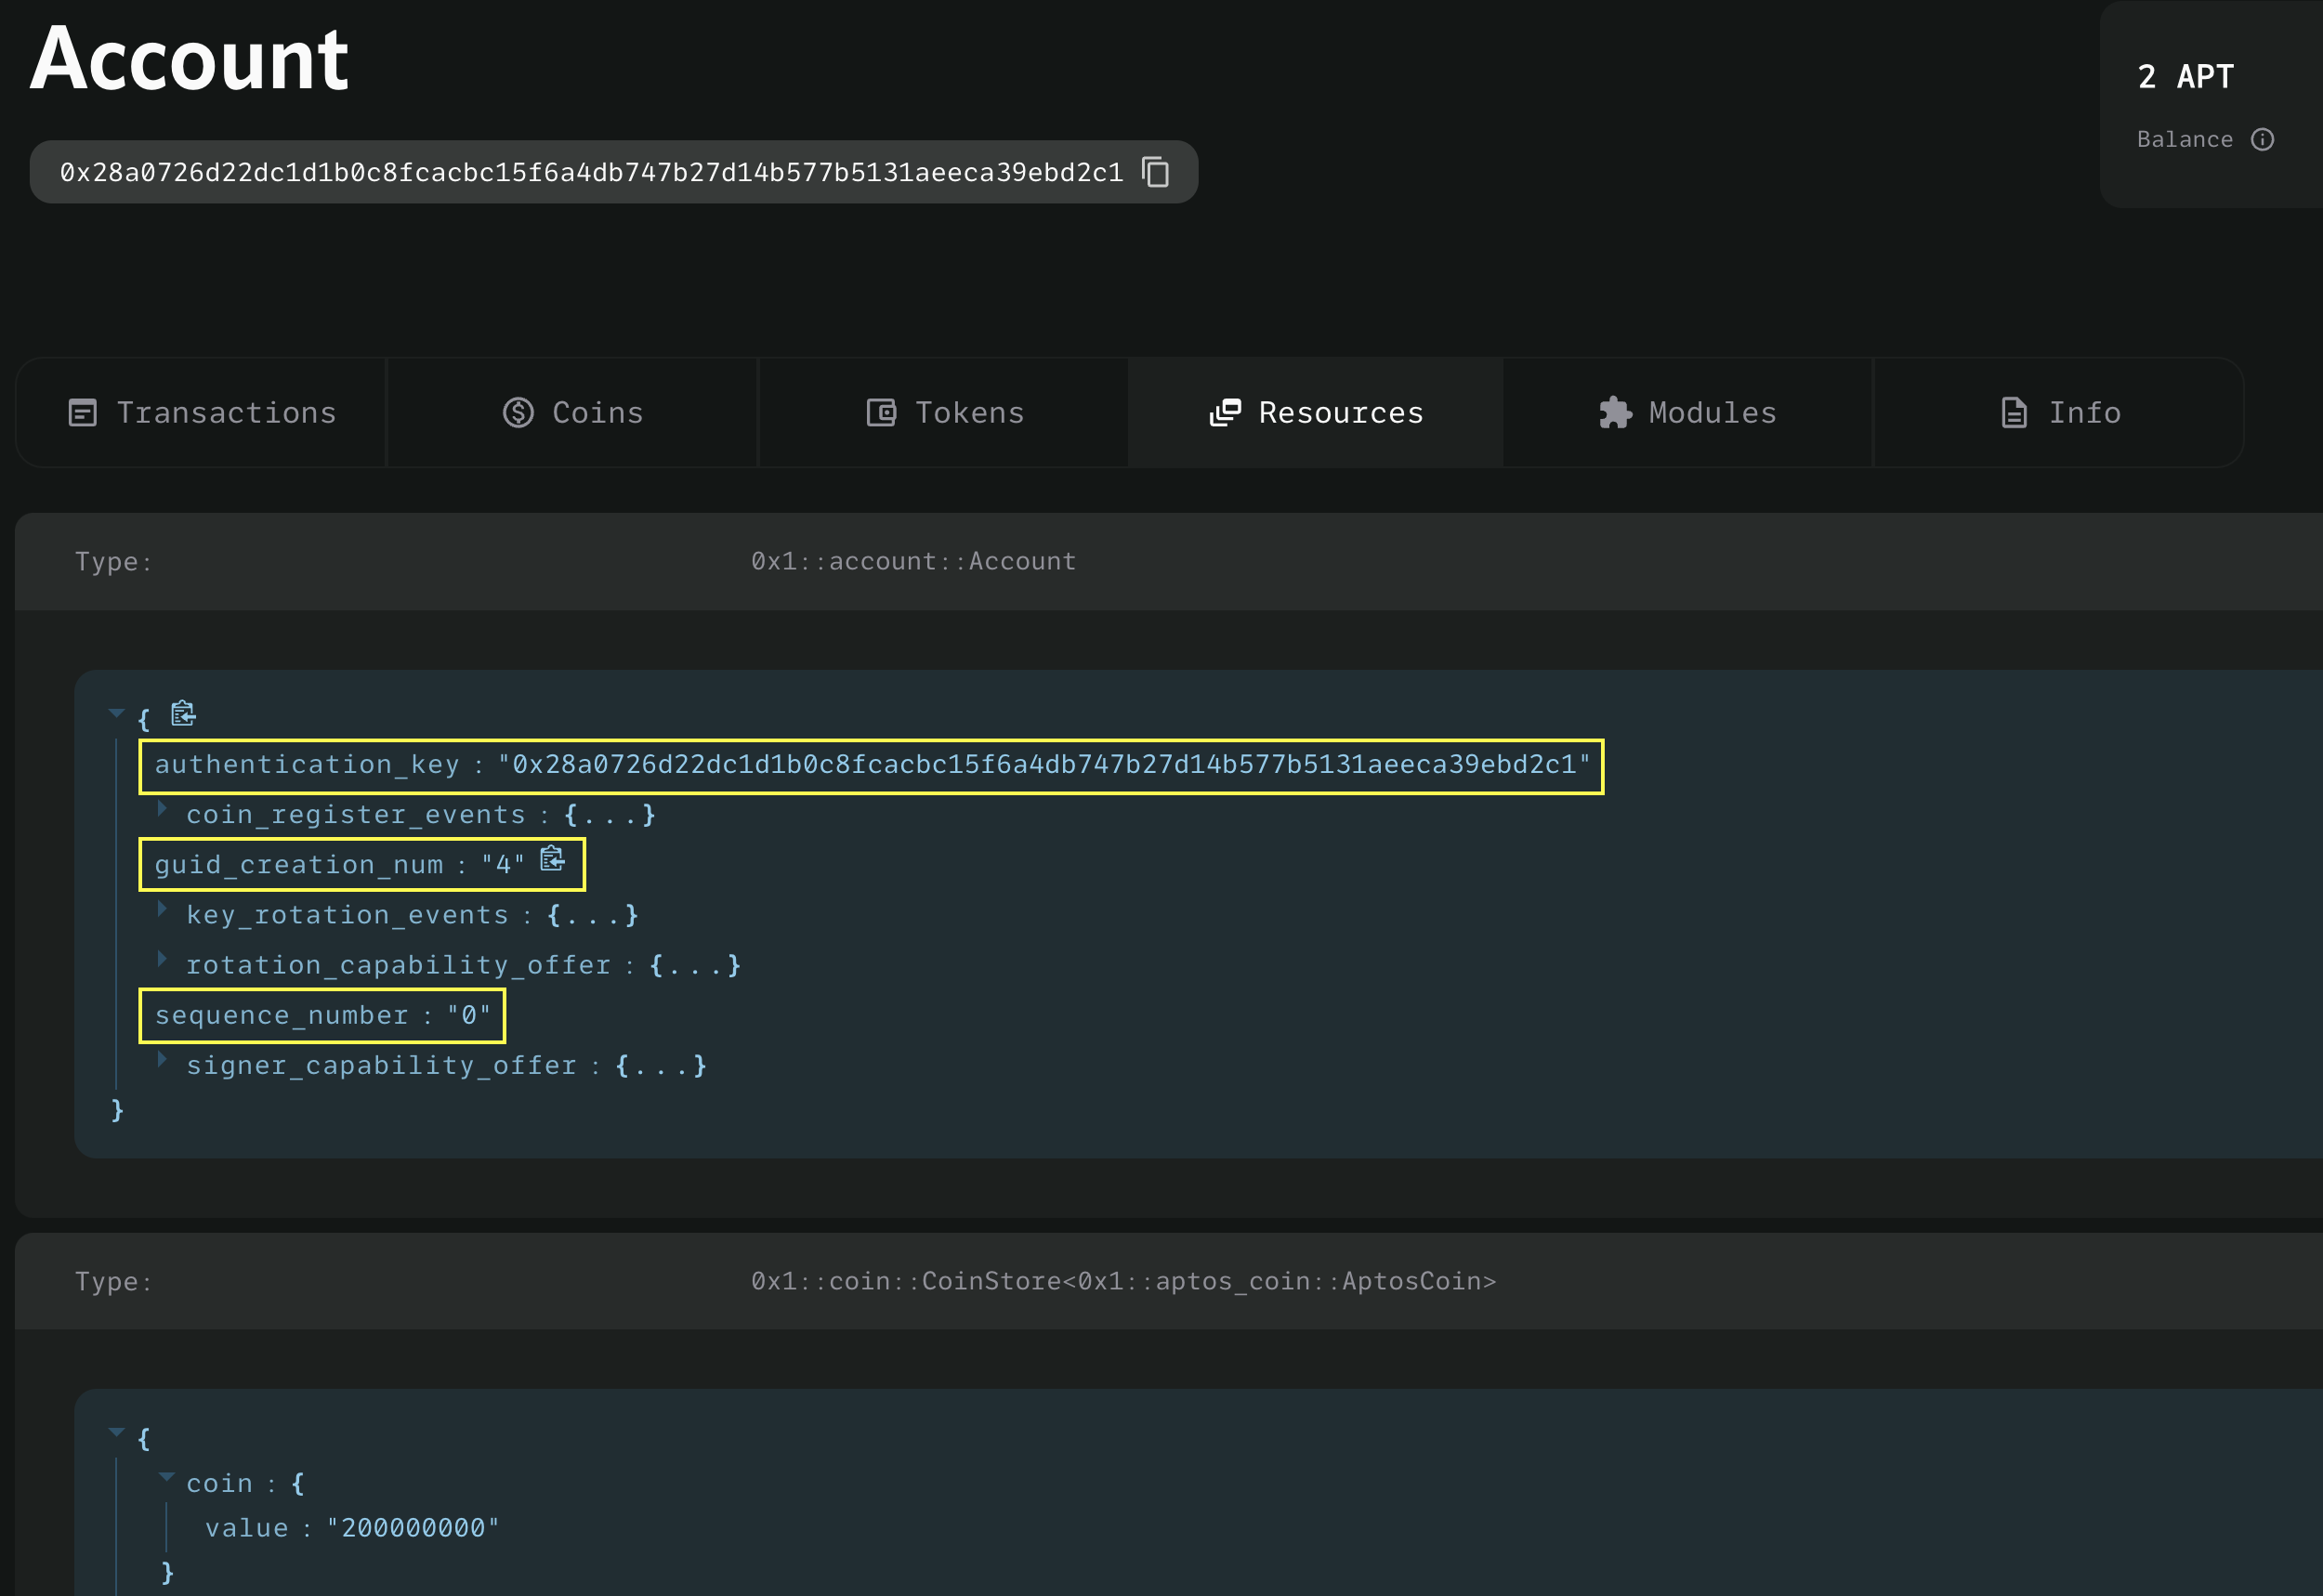
An account activated through the faucet can be seen in the Aptos Explorer with key information, including the account address, sequence number, and authentication key.
The guid is a globally unique identifier generated based on the sender's address and counter, while the account's sequence_number indicates the number of transactions submitted and committed on-chain from that account. We will explore authentication_key in more detail.
Authentication Key
The authentication key is an important element related to account security. This key is set at the time of account creation and can be changed as needed. That is, users can change the authentication key periodically for security reasons. If the private key of an account has been exposed or is likely to have been exposed, you can safely protect the account by changing the private key and authentication key while maintaining the original account address.
In Aptos, an authentication key is created from the public key in the private-public key pair, mapped to the account address, and then mapped on-chain, allowing verification of the account and authentication key.
Let's see an example. We will change the authentication key for the account we just created.
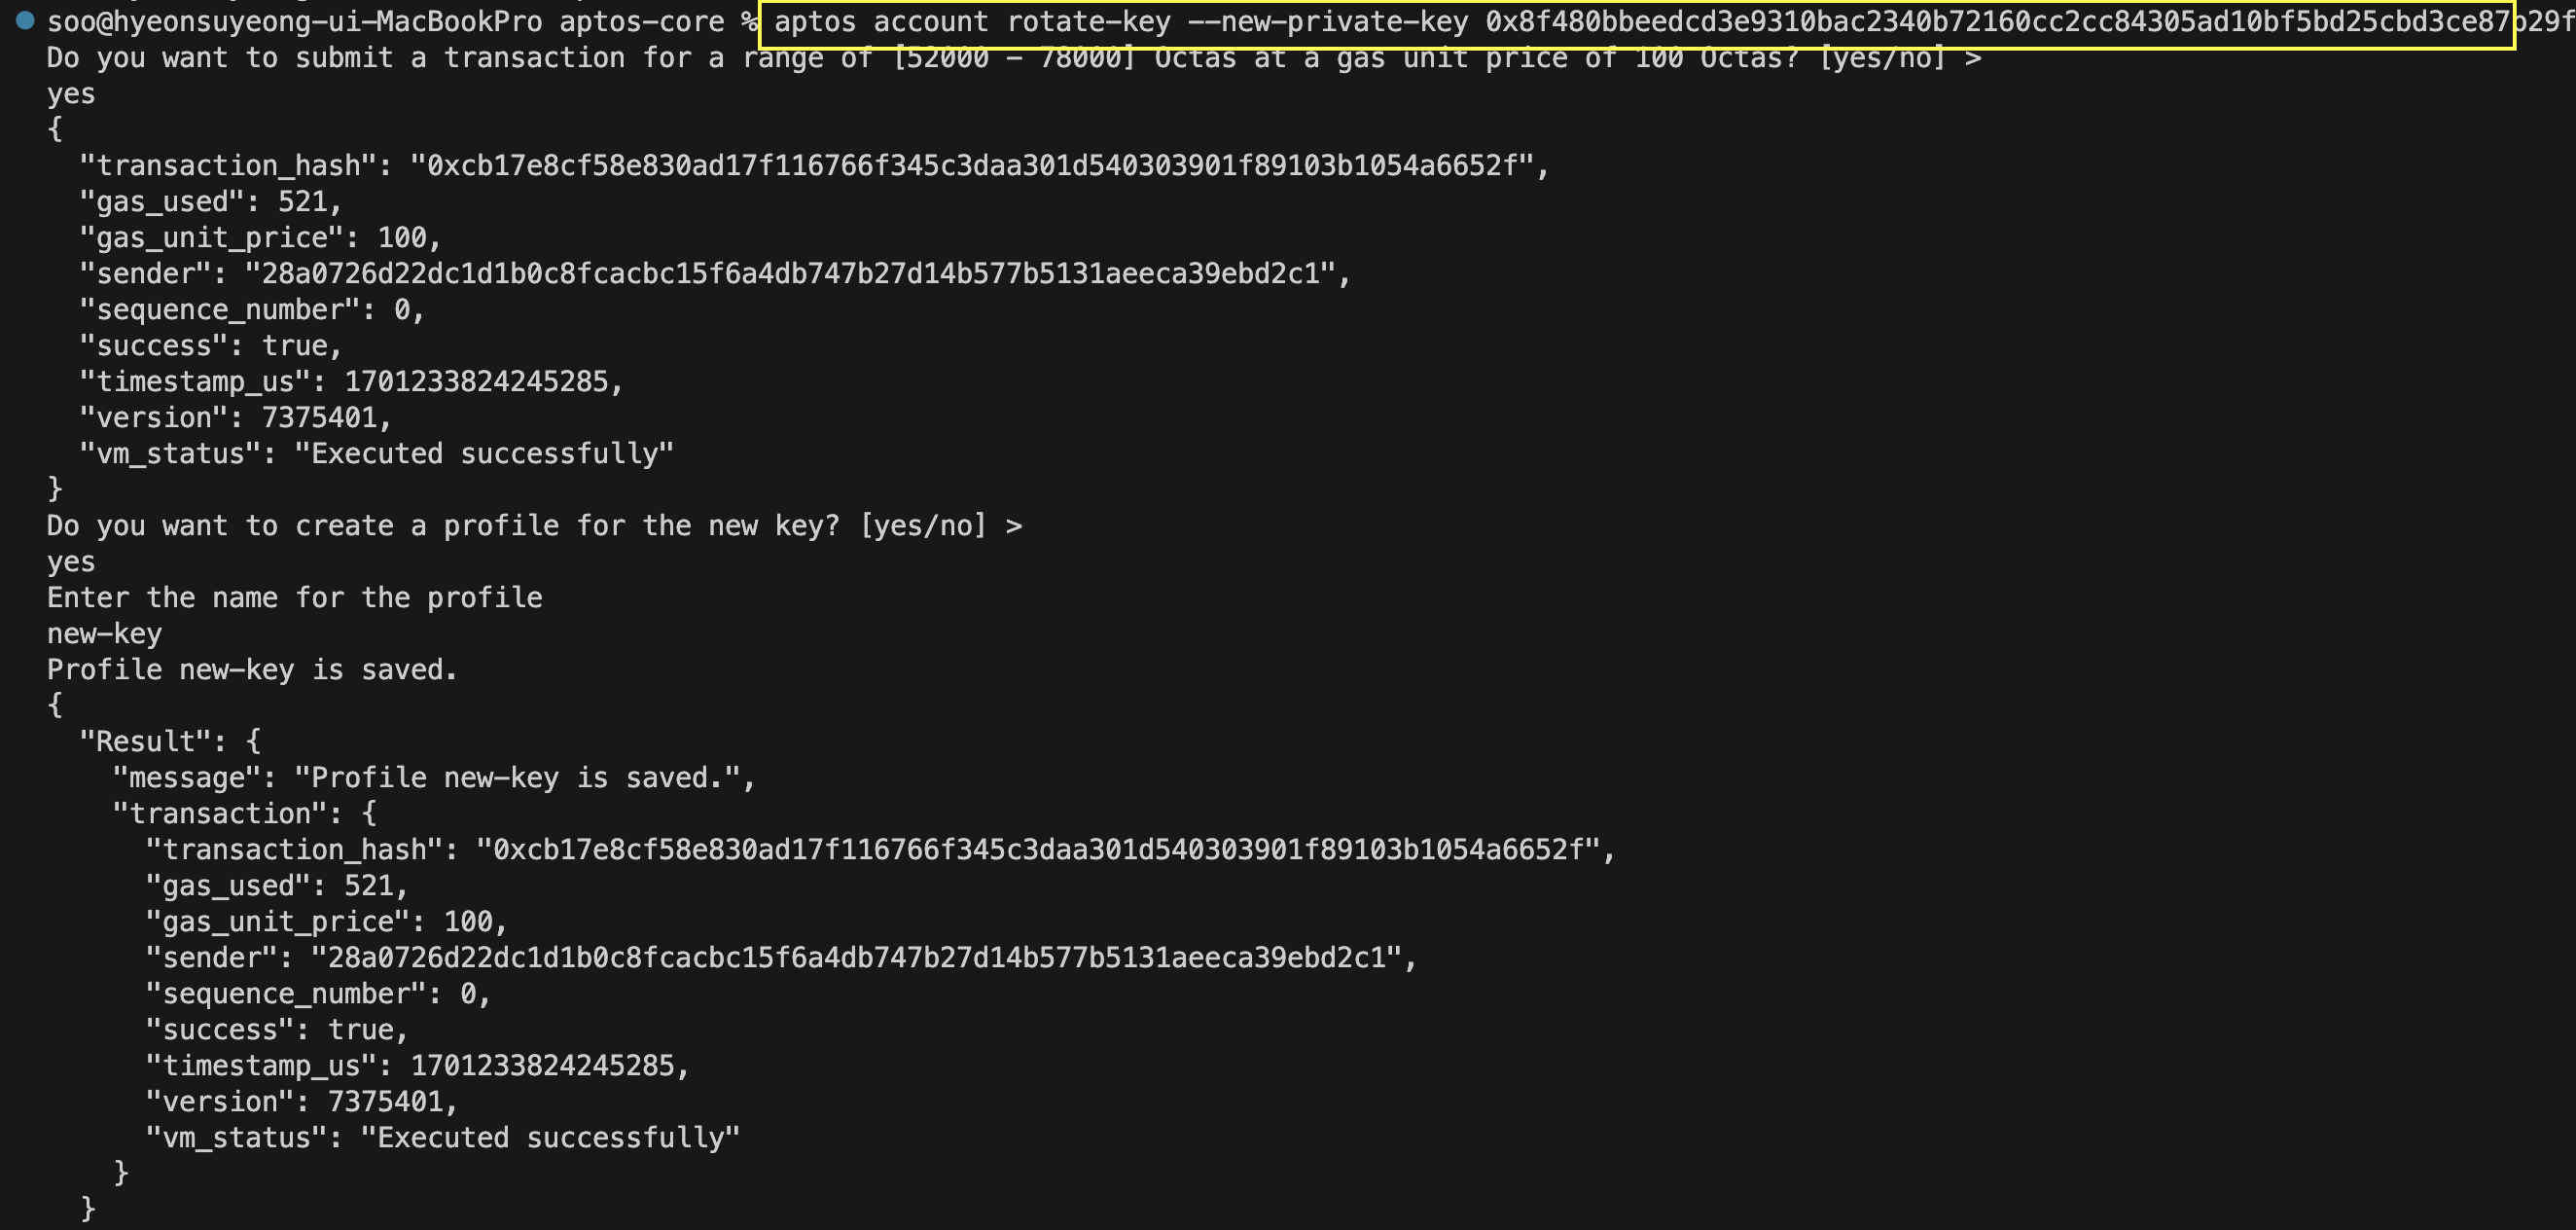
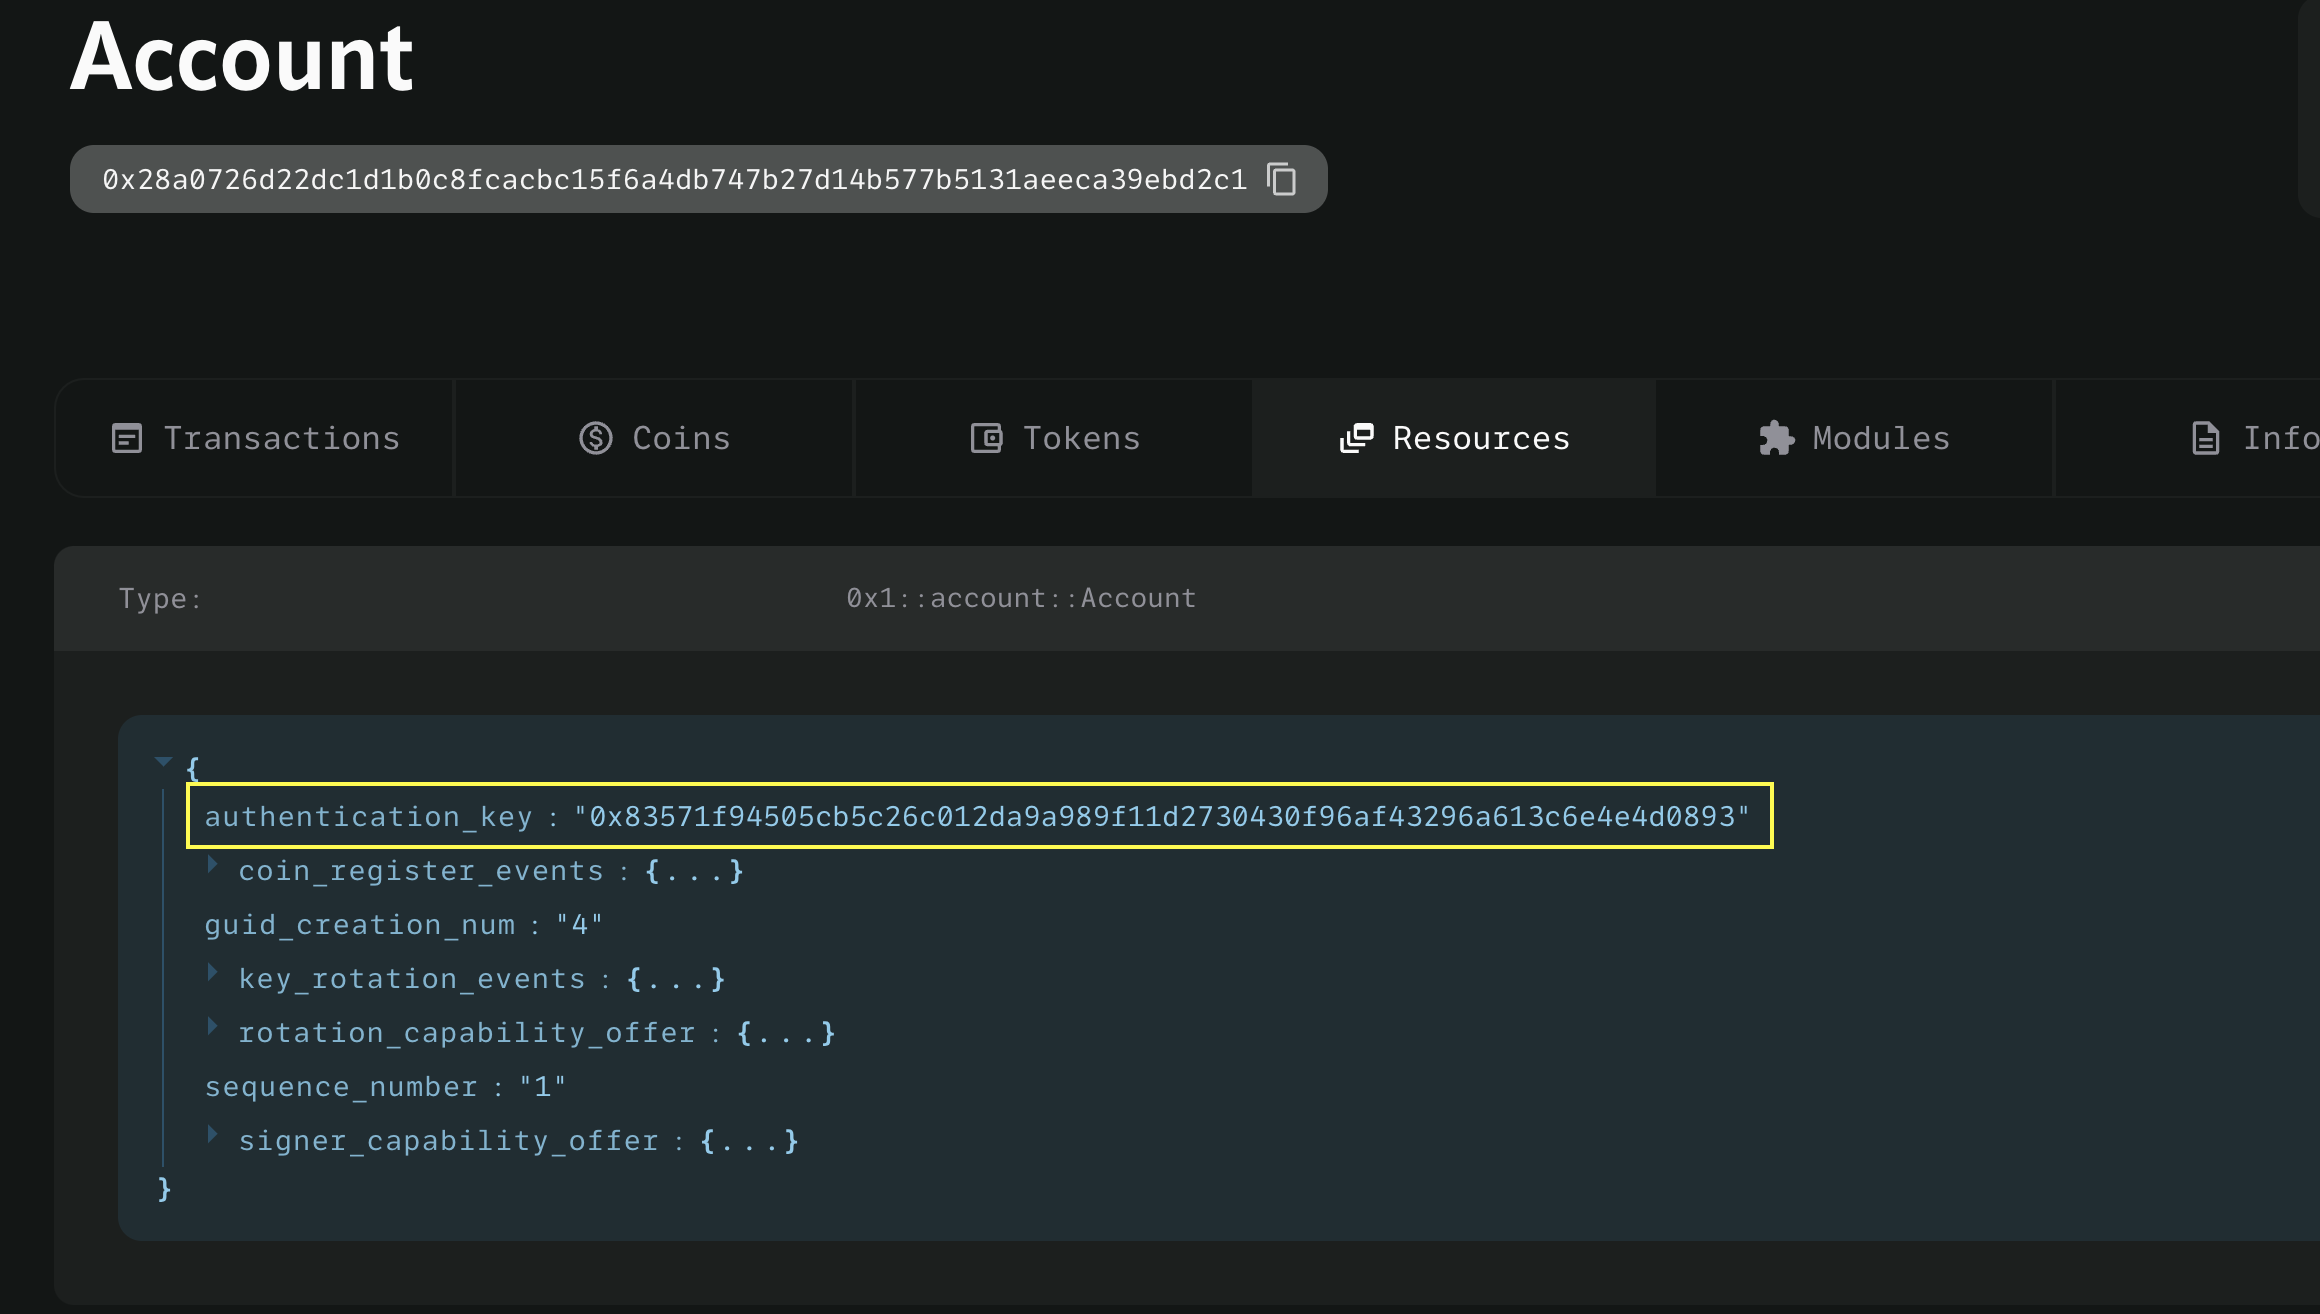
The rotate-key feature of aptos-cli was utilized to change the authentication key. Subsequently, through the explorer, it was confirmed that the authentication key for the original account, 0x28a0…2c1, had been changed.
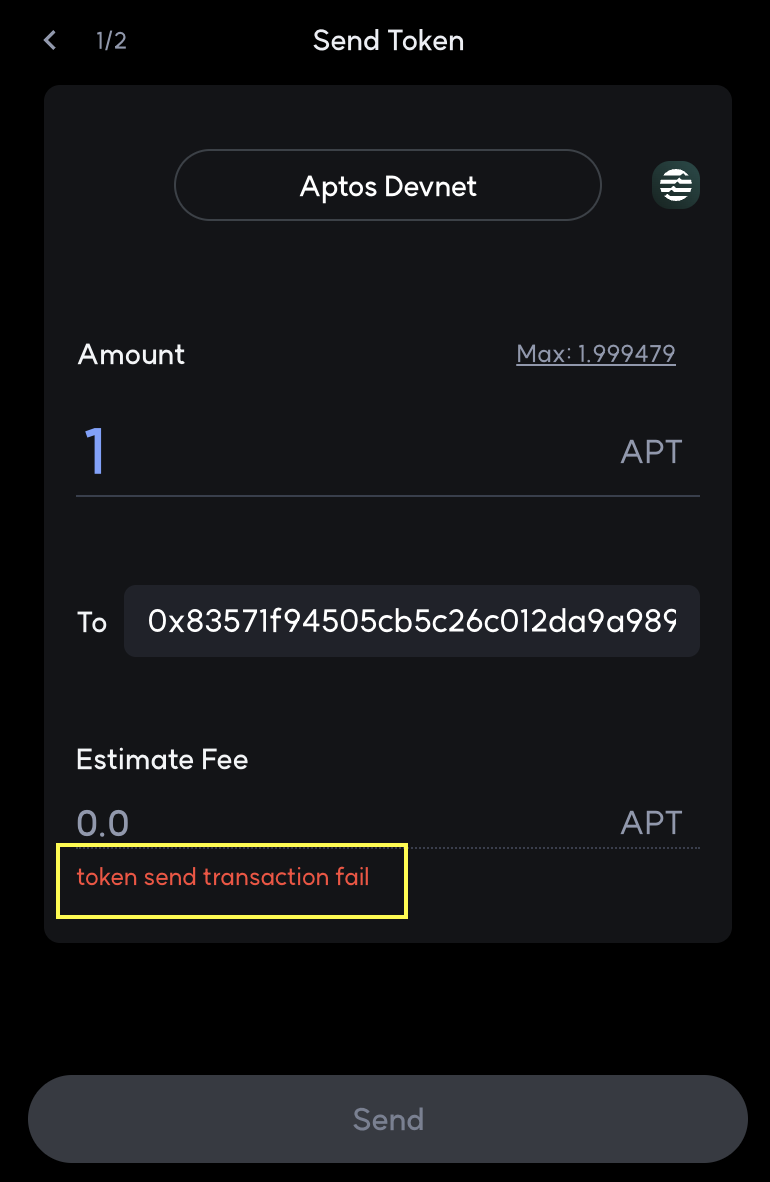
Since the previous key, prior to the change, is stored in the wallet, if a transaction is signed and sent using this old key, it will naturally fail.
Let's examine an example from the code in the aptos-core repository.
This code utilizes the Aptos blockchain network to create two new accounts and then activates them using the faucet, followed by rotating the authentication key of one of the accounts. The primary components and process used are as follows:
The AptosAccount class is used to create two new accounts named Alice and Bob. Then, the FaucetClient is employed to transfer funds to these two accounts.
// :!:>create_accounts
  const alice = new AptosAccount();
  const bob = new AptosAccount(); // <:!:create_accounts

  await faucetClient.fundAccount(alice.address(), 1 * Math.pow(10, APTOS_COIN_DECIMALS));
  await faucetClient.fundAccount(bob.address(), 1 * Math.pow(10, APTOS_COIN_DECIMALS));
Alice's authentication key is changed to Bob's secret key.
const response = await provider.aptosClient.rotateAuthKeyEd25519(alice, bob.signingKey.secretKey); // <:!:rotate_key
After the authentication key is changed, a new instance of Alice's account is created using the new private key and the existing address of Alice
// We must create a new instance of AptosAccount because the private key has changed.
  const aliceNew = new AptosAccount(
    bob.signingKey.secretKey,
    alice.address(), // NOTE: Without this argument, this would be bob, not aliceNew. You must specify the address since the private key matches multiple accounts now
  );
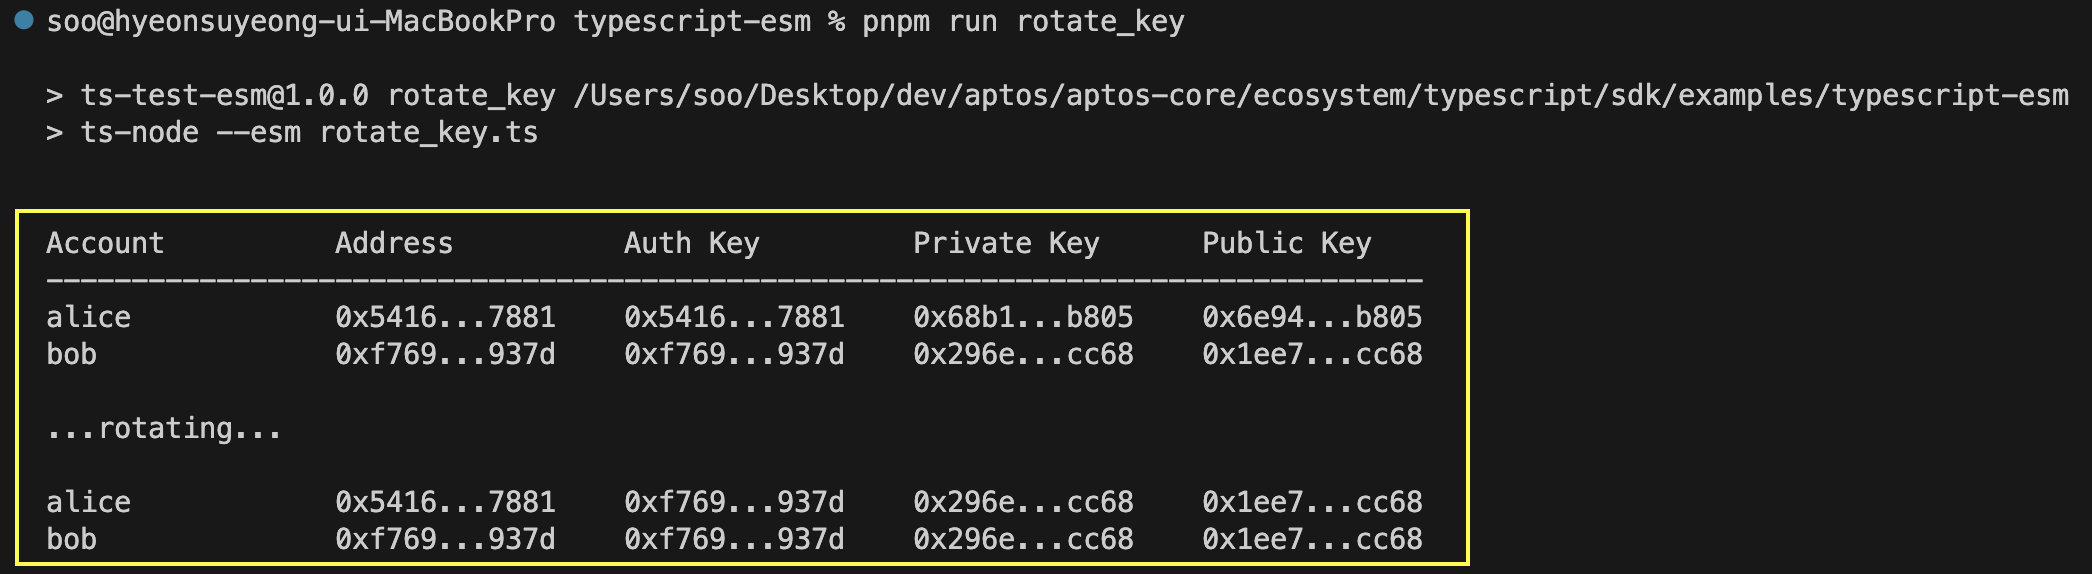
Below are the execution results. It can be observed that Alice's authentication key has been changed to Bob's.
Multisig Account
In the Aptos blockchain, the Multisig (Multisignature) feature is a crucial mechanism for managing transactions that require the approval of multiple entities (owners). This feature enhances security and is especially useful in situations requiring joint decisions. For instance, it can be used in organizational fund management or executing significant contracts that require the approval of multiple stakeholders.
We will explore how to implement a multisig account using the multisig_account.ts script. This example covers the creation of a multisig account, addition and removal of administrators, and changing the signature threshold settings.
Here is a scenario and an explanation of the main functions in the example code.
Aptos accounts are created for three owners (owner1, owner2, owner3), and funds are provided to each account.
const owner1 = new AptosAccount();
const owner2 = new AptosAccount();
const owner3 = new AptosAccount();
await faucetClient.fundAccount(owner1.address(), 100_000_000);
await faucetClient.fundAccount(owner2.address(), 100_000_000);
await faucetClient.fundAccount(owner3.address(), 100_000_000);
Multisig Account Setup (2-of-3): A 2-of-3 multisig account is created using owner1. This type of account requires the approval of two out of three owners.
const payload: Gen.ViewRequest = {
  function: "0x1::multisig_account::get_next_multisig_account_address",
  arguments: [owner1.address().hex()],
};
const multisigAddress = (await client.view(payload))[0] as string;

// Create the multisig account with 3 owners and a signature threshold of 2.
const createMultisig = await client.generateTransaction(owner1.address(), {
  function: "0x1::multisig_account::create_with_owners",
  type_arguments: [],
  arguments: [[owner2.address().hex(), owner3.address().hex()], 2, ["Shaka"], [BCS.bcsSerializeStr("Bruh")]],
});
await client.generateSignSubmitWaitForTransaction(owner1, createMultisig.payload);
Funding the Multisig Account: Funds are provided to the created multisig account.
await faucetClient.fundAccount(multisigAddress, 100_000_000);
Creating and Executing Multisig Transactions: Transactions for transferring coins using the multisig account are created and executed.
const recipient = new AptosAccount();
const transferTxPayload = new MultiSigTransactionPayload(
  EntryFunction.natural(
    "0x1::aptos_account", "transfer", [],
    [BCS.bcsToBytes(AccountAddress.fromHex(recipient.address())), BCS.bcsSerializeUint64(1_000_000)]
  ),
);
const createMultisigTx = await client.generateTransaction(owner2.address(), /*...*/);
await client.generateSignSubmitWaitForTransaction(owner2, createMultisigTx.payload);
Executing Multisig Transactions (Using Payload Hash): Another multisig transaction is created and executed using the payload's hash. This process means creating and executing transactions in a safer and more efficient way using the hash of the payload.
const transferTxPayloadHash = sha3Hash.create();
transferTxPayloadHash.update(BCS.bcsToBytes(transferTxPayload));
const createMultisigTxWithHash = await client.generateTransaction(owner2.address(), {
  function: "0x1::multisig_account::create_transaction_with_hash",
  type_arguments: [],
  arguments: [multisigAddress, transferTxPayloadHash.digest()],
});
await client.generateSignSubmitWaitForTransaction(owner2, createMultisigTxWithHash.payload);
Managing Multisig Account Owners: The process of adding new owners to the multisig account and then removing them is carried out.
const addOwnerPayload = new MultiSigTransactionPayload(
  EntryFunction.natural(
    "0x1::multisig_account", "add_owner", [],
    [BCS.bcsToBytes(AccountAddress.fromHex(owner_4.address()))]
  ),
);
const removeOwnerPayload = new MultiSigTransactionPayload(
  EntryFunction.natural(
    "0x1::multisig_account", "remove_owner", [],
    [BCS.bcsToBytes(AccountAddress.fromHex(owner_4.address()))]
  ),
);
Changing Signature Threshold: The signature threshold of the multisig account is changed to 3-of-3.
const changeSigThresholdPayload = new MultiSigTransactionPayload(
  EntryFunction.natural(
    "0x1::multisig_account", "update_signatures_required", [],
    [BCS.bcsSerializeUint64(3)]
  ),
);
Reject and Approve Function (rejectAndApprove): Implements the process of rejecting or approving multisig transactions.
const rejectAndApprove = async (client, owner1, owner2, multisigAddress, transactionId) => {
  let rejectTx = await client.generateTransaction(
    owner1.address(),
    {
      function: "0x1::multisig_account::reject_transaction",
      arguments: [multisigAddress, transactionId],
      /* ... */
    }
  );
  let approveTx = await client.generateTransaction(
    owner2.address(),
    {
      function: "0x1::multisig_account::approve_transaction",
      arguments: [multisigAddress, transactionId],
      /* ... */
    }
  );
};
Functions to Check the Number of Owners and Signature Threshold (getNumberOfOwners, getSignatureThreshold): Implements the feature to check the number of owners and the signature threshold of the multisig account.
const getNumberOfOwners = async (client, multisigAddress) => {
  const multisigAccountResource = await client.getAccountResource(
    multisigAddress, "0x1::multisig_account::MultisigAccount"
  );
  return Number((multisigAccountResource.data as any).owners.length);
};
const getSignatureThreshold = async (client, multisigAddress) => {
  const multisigAccountResource = await client.getAccountResource(
    multisigAddress, "0x1::multisig_account::MultisigAccount"
  );
  return Number((multisigAccountResource.data as any).num_signatures_required);
};
Below are the execution results.
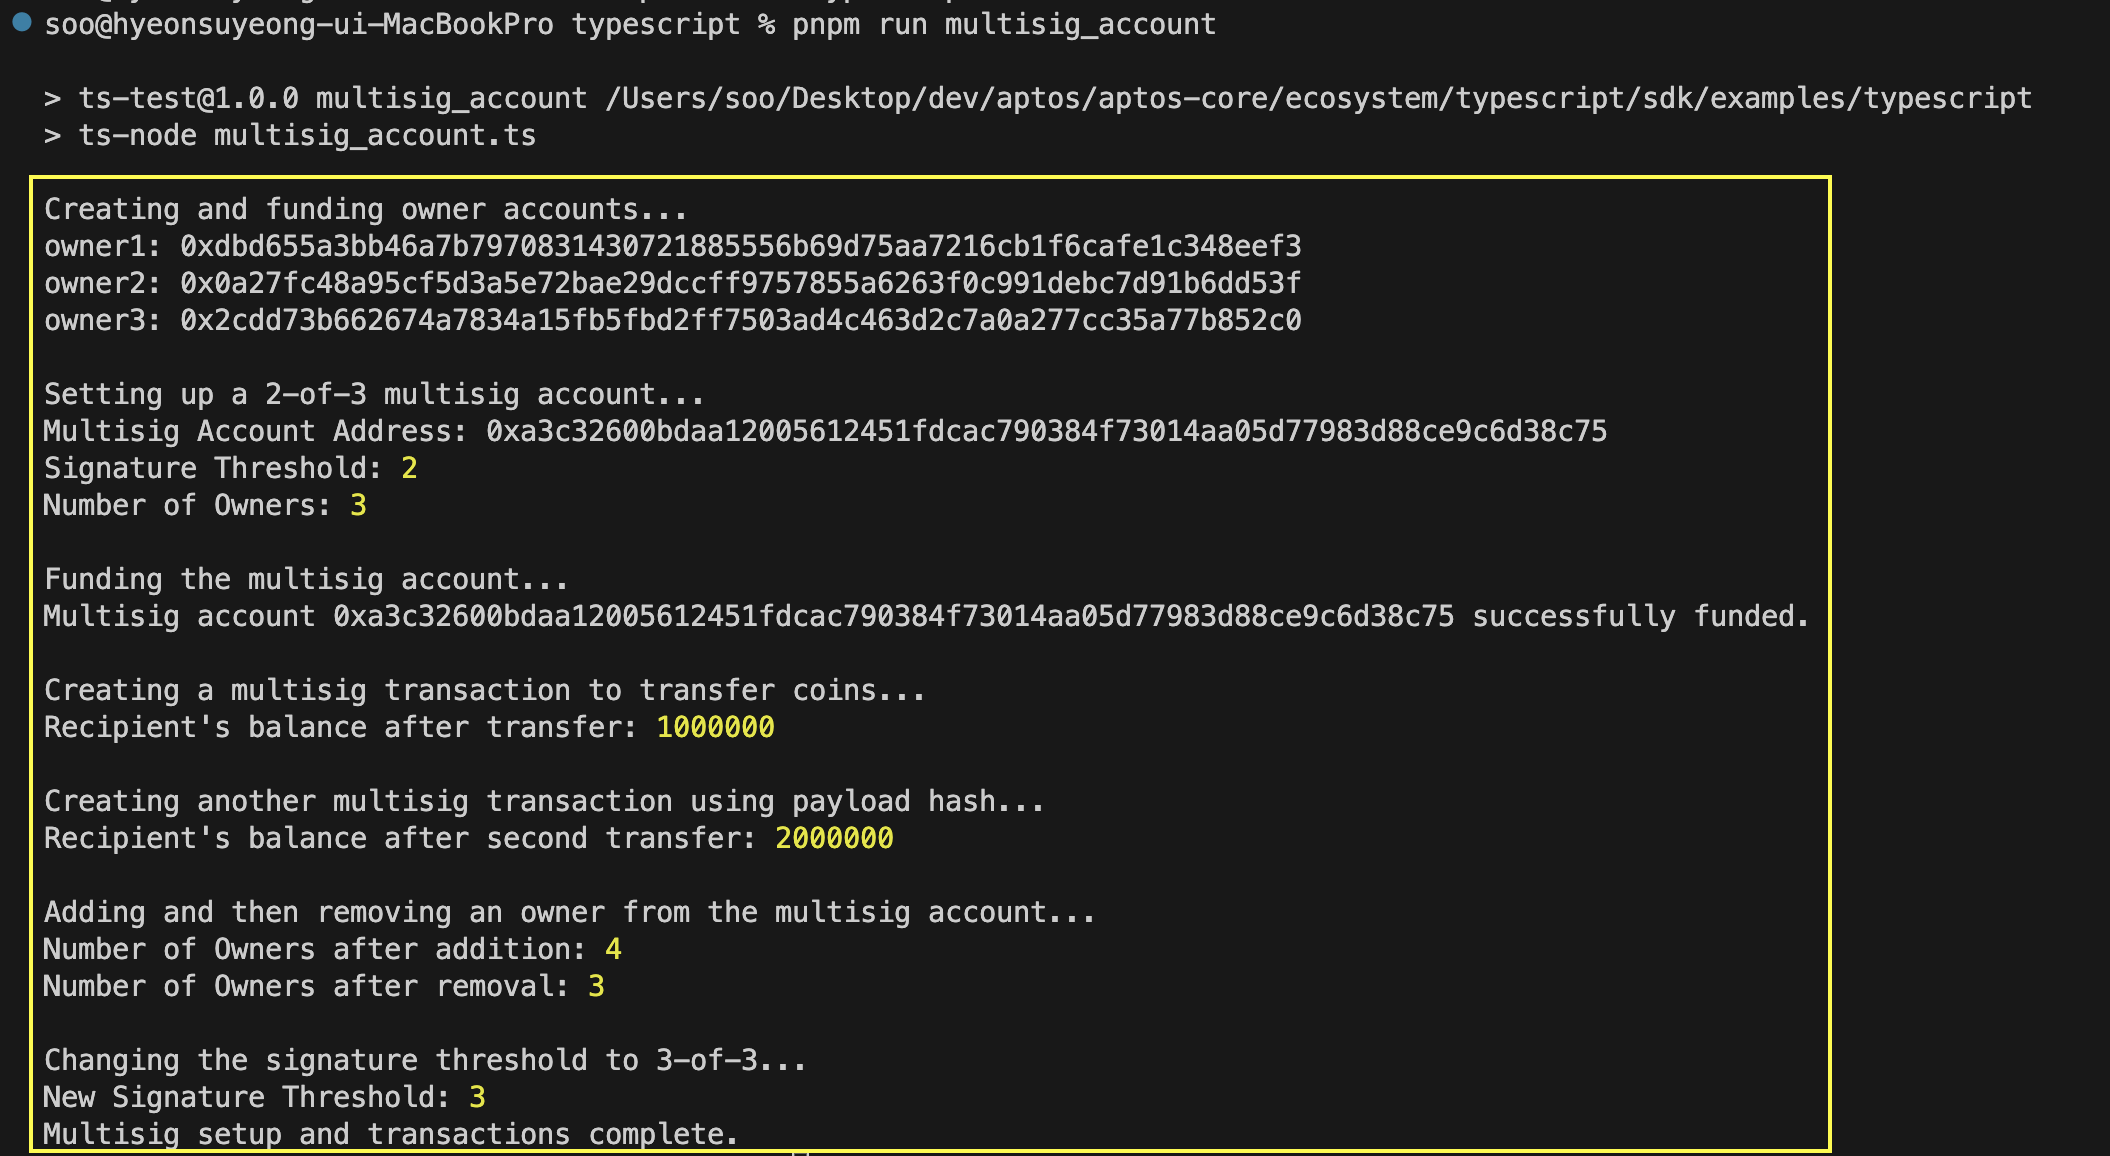
Aptos's multisig feature enhances the core advantages of blockchain technology, decentralized trust, and security. It allows users to secure higher levels of security in various areas, such as asset management and contract execution. This multisig mechanism plays a crucial role in the development of decentralized applications(DApps) as one of the various features offered by the Aptos blockchain.
Conclusion
Through this article, we have explored the account model of the Aptos blockchain, particularly focusing on Key rotation and Multisig Account features. The unique functions and user-friendly account management system of the Aptos blockchain play an important role in the advancement of blockchain technology and its wider application. This knowledge provides valuable insights into the future of blockchain technology and its application in various application developments, helping us to actively participate in the innovative journey as members of the Aptos ecosystem.