Deploy and Execute a Rust Counter Contract in NEAR using WELLDONE Code
Introduction
This tutorial shows you how to use WELLDONE Code to deploy and execute a simple counter smart contract on the NEAR Testnet. The first Remix IDE plug-in to support multi-chain, WELLDONE Code, makes it easier for Web3 developers to deploy and test contracts on a multi-chain.
Every time you want to develop on a new network, we reduce the difficulty of rebuilding a development environment that fits new network, and provide an environment where developers can focus on development and testing. For a more detailed description of the WELLDONE Code, please refer to the following page.
WELLDONE Code currently supports Celo, Klaytn and NEAR, and it will subsequently support Juno, Sui, and Aptos.
- The WELLDONE Code currently supports the WELLDONE Wallet. Please install the WELLDONE Wallet extension in the Chrome browser. A detailed description of the WELLDONE Wallet can be found at the following link.
- Knowledge of Rust is beneficial to understand smart contracts.
Add WELLDONE Code to Remix IDE
First, visit the Remix IDE and then follow the instructions below to add the WELLDONE Code plug-in.
Click
Plugin ManagerIcon in the left bar.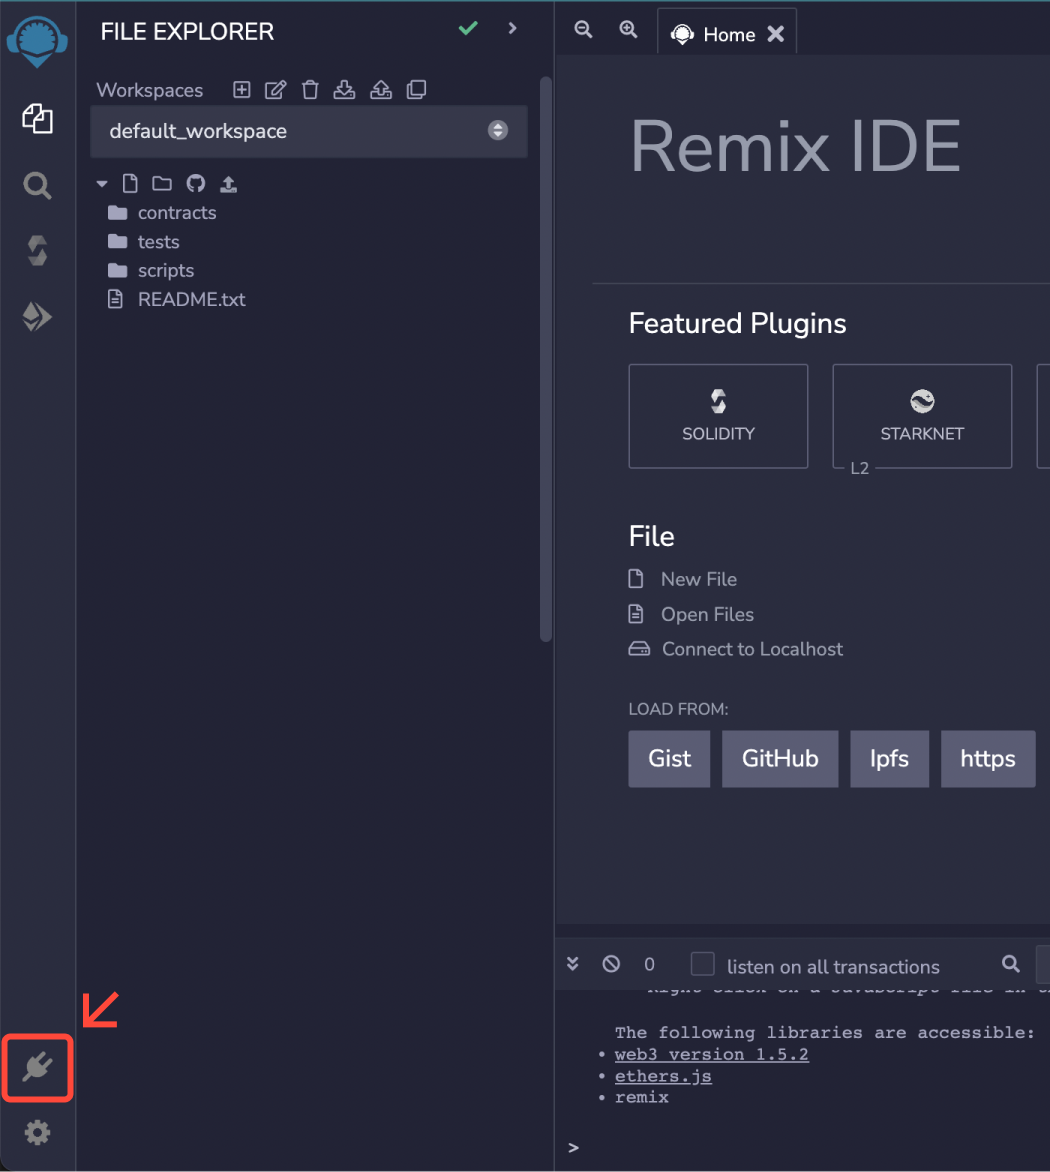
Search for CODE BY WELLDONE STUDIO and click the
Activatebutton.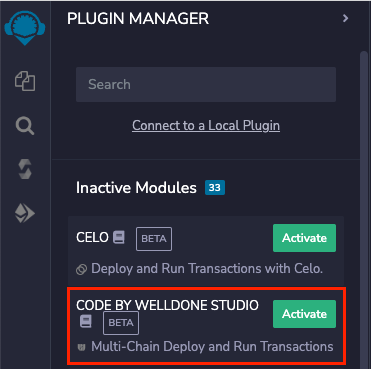
If the plug-in has been successfully added, you can run the WELLDONE Code by clicking the icon shown in the left bar.
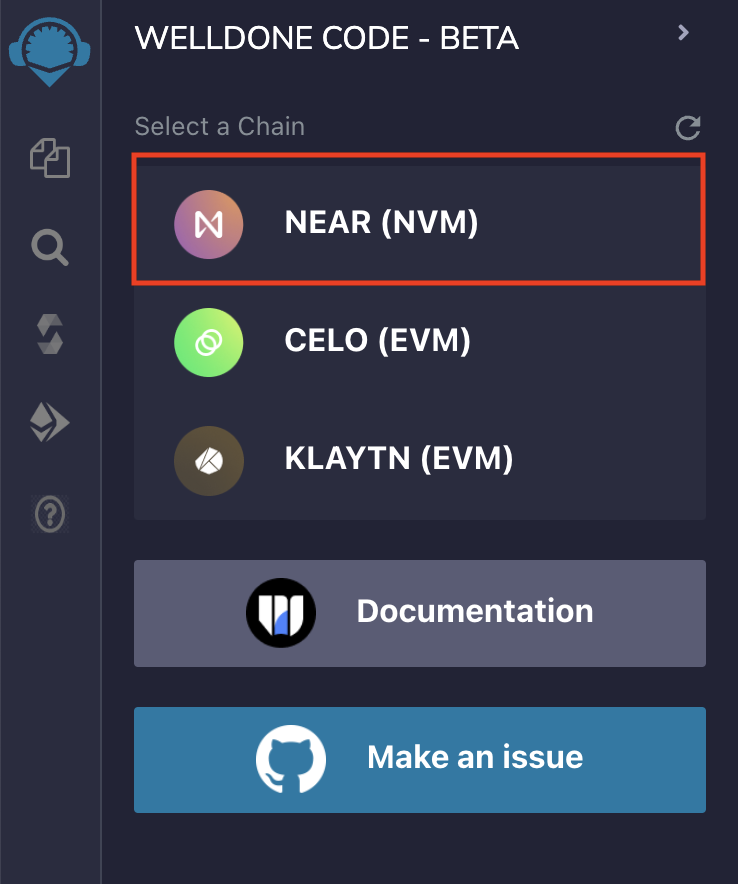
To understand more about the WELLDONE Code and how to utilize it, click the Documentation button to go to the WELLDONE Studio Docs page. Also, please feel free to report any issues you encounter while using it by clicking Make an issue button.
Write a Smart Contract in NEAR using WELLDONE Code
Connect to WELLDONE Wallet
When you select NEAR in the Select a Chain section, the following screen appears:
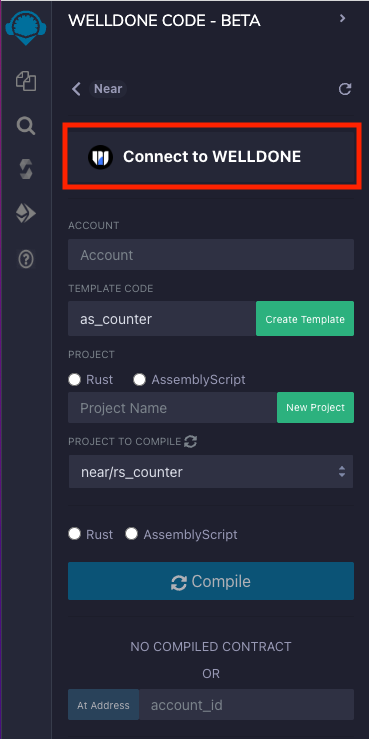
To use the WELLDONE Code, you must first connect to the WELLDONE Wallet by clicking the Connect to WELLDONE button. If you click the button without installing the WELLDONE wallet, the following logs will be displayed on the terminal. Follow the instructions in the log to install the WELLDONE Wallet extension.
Please Install WELLDONE Wallet https://chrome.google.com/webstore/detail/welldone-wallet/bmkakpenjmcpfhhjadflneinmhboecjf . If you have installed it, please press the refresh button.
After you install the WELLDONE Wallet extension, you must create a wallet and a NEAR account. The log Please Unlock your WELLDONE Wallet OR Create Account will be printed on the terminal if you click the Connect to WELLDONE button without first creating an account. To create an account with the WELLDONE Wallet, please refer to the following manual.
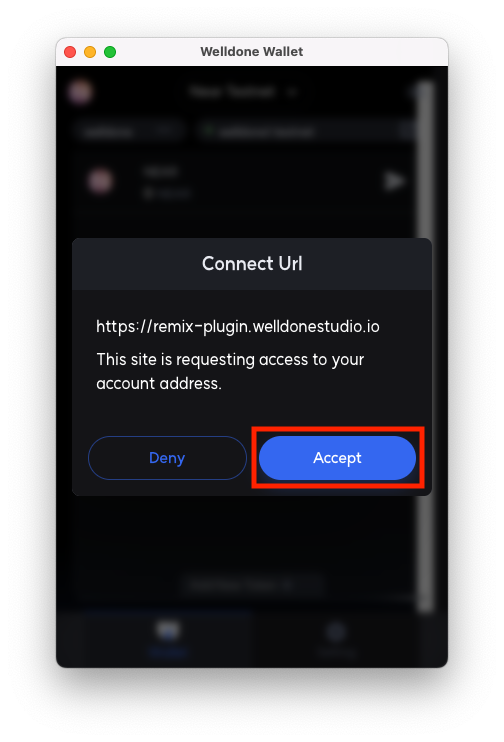
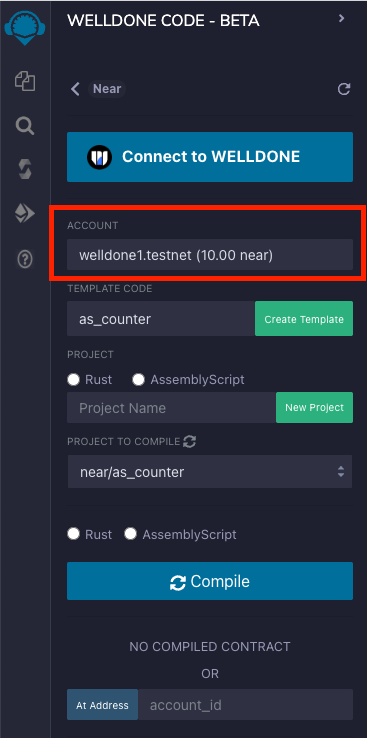
After create a NEAR account in the WELLDONE Wallet, click the Connect to Wallet button to connect the WELLDONE Code to your wallet. The ID and balance of the account are displayed in Account section when you click the Accept button in the popup that asks for access as show below.
Create a Template Code
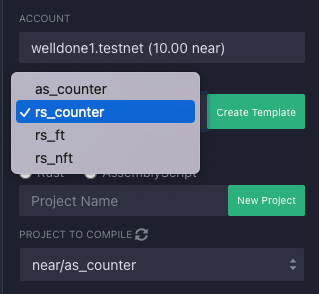
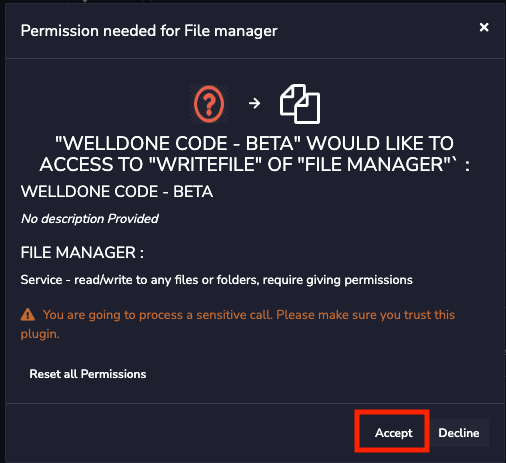
In the TEMPLATE CODE section, you can generate simple Counter examples written in Rust, AssemblyScript, JavaScript and TypeScript as well as FT and NFT example codes written in Rust. We are going to use the Counter example written as Rust, so select rs_counter and click the Create Template button. After clicking Accept in the window asking for permission to access the file, if the file has been successfully created, the terminal will display a log rs_counter is created successfully.
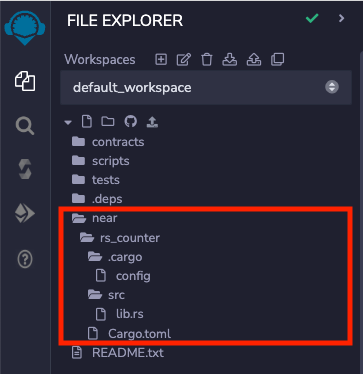
If you go to workspace, you can see that the folder named rs_counter has been created within the near folder as follows:
Instead of using the template code we give, if you want to construct your own Smart Contract, choose the language you want to use, enter the Project Name, and. then click the New Project button. This will automatically create the following basic structure:
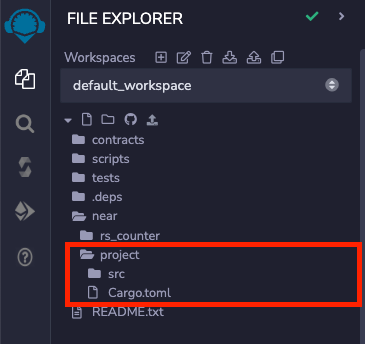
In order to compile and deploy contracts in NEAR using WELLDONE Code, you must create contracts inside the near/ folder. Please refer the Code docs for more information.
Explore Smart Contract
Now let's take a look at the contract code together in the src/lib.rs file inside the rs_counter folder to learn how to write a smart contract using Rust in NEAR.
At the top of src/lib.rs, you can see the code below to import the modules needed to write a smart contract from near_sdk declared in the /Cargo.toml.
use near_sdk::borsh::{self, BorshDeserialize, BorshSerialize};
use near_sdk::{log, near_bindgen};
self: Required for BorshDeserialize and BorshSerialize to work. It refers to the smart contract self.BorshDeserialize: De-serializing JSON-type arguments when transferring arguments together while calling functions in smart contracts.BorshSerialize: Serializing to JSON when smart contract resends results.near_bindgen: It is an annotation that tells you that it is a smart contract. Each contract must have at least onestructdeclared with anear_bindgenannotation.
Next, declare struct. The attributes above the struct allow files compiled with WebAssembly to be compatible on the NEAR blockchain. Default is the default constructor for a contract, and when you attempt to run a function after the contract is deployed, the virtual machine in NEAR initializes the contract to its default value before the function runs.
For the code below, val will be initialized to the default value of i8 type 0. pub means that the smart contract is publicly accessible.
#[near_bindgen]
#[derive(Default, BorshDeserialize, BorshSerialize)]
pub struct Counter {
    val: i8,
}
If you want to initialize the contract with a value other than the default value, you can implement it as follows.
#[near_bindgen]
#[derive(BorshDeserialize, BorshSerialize)]
pub struct Counter {
    val: i8,
}

impl Default for Counter{
    fn default() -> Self {
        Counter {val: 8}
    }
}
Now, we implement the actual functions of contract using impl. To specify that it is a function belonging to NEAR's smart contract, we add the near_bindgen annotation as we saw in struct earlier.
#[near_bindgen]
impl Counter {
    // ...
}
When writing smart contracts using Rust, it is common to write them in a pattern that has a struct and an impl that implements the actual function. Let's take a closer look at the function.
The counter contract implements four functions: get_num, increment, decrement, and reset. First, the get_num function code is as follows.
&self passed as an argument refers to an instance of struct and since the function returns a counter value of type i8, specify the return type.
pub fn get_num(&self) -> i8 {
    return self.val;
}
Next, let's look at the increment function, which adds 1 to the counter value in storage, and the decrement function, which subtracts 1. Unlike get_num, increment and decrement functions change the value inside the contract. &mut means mutable and &mut self creates a mutable reference to the variable self.
pub fn increment(&mut self) {
    self.val += 1;
    log!("Increased number to {}", self.val);
}

pub fn decrement(&mut self) {
    self.val -= 1;
    log!("Decreased number to {}", self.val);
}
Lastly, it is a reset function that resets the counter value of the contract to 0. Like the increment and decrement functions, &mut self is used to change the value inside the contract.
pub fn reset(&mut self) {
    self.val = 0;
    log!("Reset counter to zero");
}
We looked at all the smart contract codes like this. Next, let's take a look at the test code.
mod tests literally means a module named tests. cfg is a compilation command to compile the module only if the condition in parentheses is true. In the case below, if the test is not executed, the module will not be compiled because the (test) condition becomes true only when the cargo test command is executed.
#[cfg(test)]
mod tests {
There is five test codes. The increment and decrement functions first create a Counter instance with the counter value initialized to 0, then execute increment and decrement, respectively, and retrieve the value with get_num again to check whether the value has been changed well.
#[test]
fn increment() {
    // instantiate a contract variable with the counter at zero
    let mut contract = Counter { val: 0 };
    contract.increment();
    assert_eq!(1, contract.get_num());
}

#[test]
fn decrement() {
    let mut contract = Counter { val: 0 };
    contract.decrement();
    assert_eq!(-1, contract.get_num());
}
The increment_and_reset function creates a Counter instance in the same way as above, then executes increment and reset in sequence to check whether the value obtained with get_num is properly reset to 0.
#[test]
fn increment_and_reset() {
    let mut contract = Counter { val: 0 };
    contract.increment(1);
    contract.reset();
    assert_eq!(0, contract.get_num());
}
The panics_on_overflow and panics_on_underflow functions have attributes called should_panic. It is a test that expects an error and passes if an error occurs.
#[test]
#[should_panic]
fn panics_on_overflow() {
    let mut contract = Counter { val: 127 };
    contract.increment();
}

#[test]
#[should_panic]
fn panics_on_underflow() {
    let mut contract = Counter { val: -128 };
    contract.decrement();
}
Deploy a Smart Contract using WELLDONE Code
Compile a Smart Contract
WELLDONE Code uses the default compilation provided by NEAR. This provides stable compilation, but there is an inconvenience of having to manually input method parameters when executing the contract, so we plan to provide a compilation option using raen build in the future. For more information about raen build, please refer to the following link.
To compile a smart contract, first select the directory you want to compile in the PROJECT TO COMPILE section and the language in which the contract is written. We select near/rs_counter and Rust, then click the Compile button.
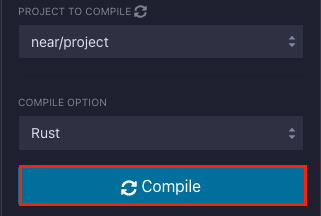
As the compilation progresses, the terminal will log the progress. When the compilation is completed, you can see that the compiled wasm file is generated in the near/rs_counter/out/counter_contract.wasm path.
If there is a change in the code after compilation and you need to perform a new compilation, you must delete the previously created out directory and compile again.
Deploy a Smart Contract
When the compilation is complete, the Deploy button will be enabled. After entering the ID of the account where the contract will be deployed, click the Deploy button to proceed with the deployment. In this case, the account ID must be an account to which the connected wallet has authority.
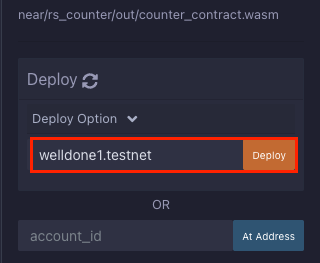
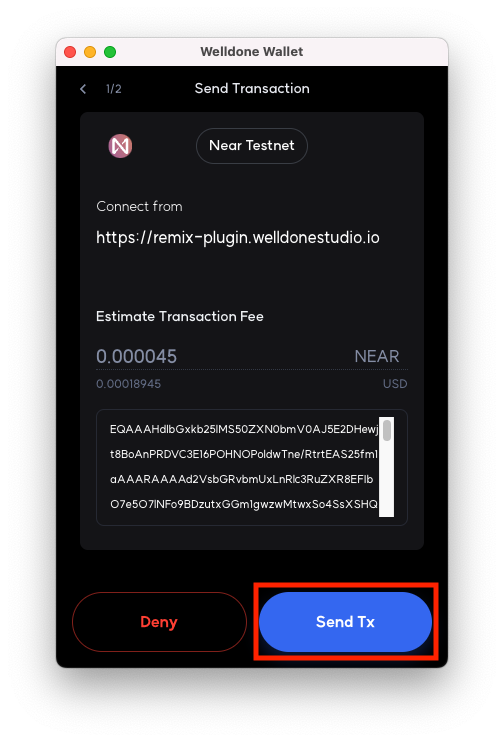
If you click Deploy button, the WELLDONE Wallet is activated and the window below appears. The transaction is sent and the transaction hash value is returned when the user clicks SendTx.
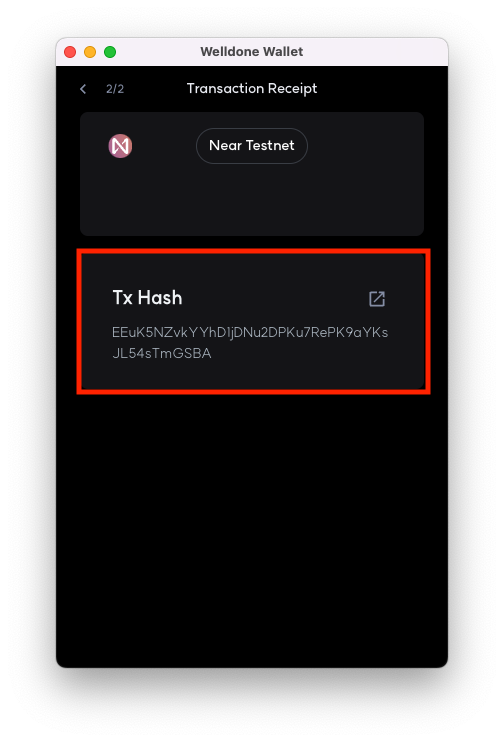
Close the open WELLDONE Wallet extension window and try again if a log with the following values is output in the terminal:
{"type":"error","value":"User rejected transaction signature.”}
The following log is output to the terminal and the details of the deployed contract are shown on the left panel if transaction verification is complete and the receipt is successfully arrived.

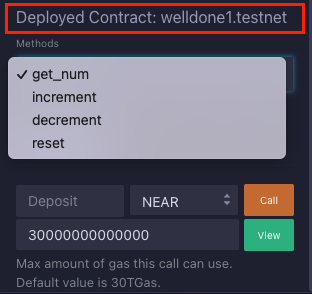
Interact with Smart Contract using WELLDONE Code
Let’s now interact with the contract deployed using WELLDONE Code. The Methods section shows the list of methods the contract has. If arguments are required, click the Add Argument button to add the required argument name, type, and value. Deposit can specify the amount of tokens to be sent with the transaction in NEAR or yoctoNEAR units. After that, depending on the method type, you can either click call or view to execute the contract.
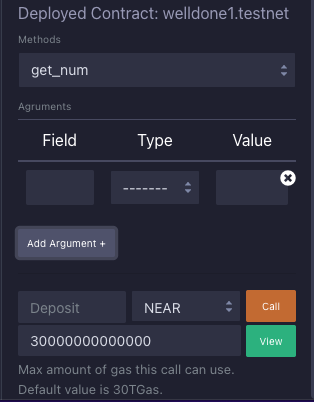
In NEAR, there are two methods for calling a contract: view and call. The view is used to execute a function that just checks the status of the contract, so you don’t have to pay for gas. The get_num method in the counter contract is view function.
The call is used to call a function that modifies the state of the contract. Since it is a transaction to pay for gas, WELLDONE Wallet signature is necessary. The increment, decrement, and reset methods in the counter contract use call.
Execute get_num method
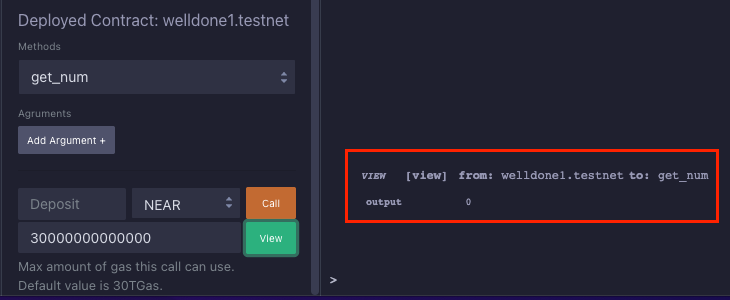
Let’s first execute the get_num method. Select get_num in the Methods section and click View button. Since the view function does not need to be signed through the wallet, it does not require any interaction with the wallet. If the method is successfully executed, the terminal will display the result.
Execute increment, decrement, reset method
Next, let’s execute the call functions. Select increment in the Methods section and click the Call button without adding any arguments as the method doesn’t need any arguments. Then the WELLDONE Wallet is activated. Click the SendTx and then wallet will return the transaction hash value.
If the transaction is successful, the following transaction receipt will show up on the terminal:
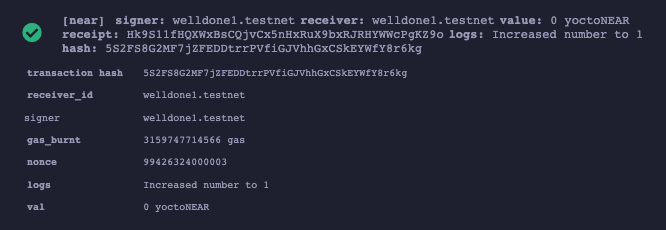
If you execute the get_num method again to get the counter value, you can see that the counter has successfully increased to 1. The decrement and reset methods can be executed in the same way.
Wrap-Up
We learned how to write, deploy, and execute a smart contract in NEAR using WELLDONE Code. With WELLDONE Code, you can develop smart contracts without requiring any other environment settings other than WELLDONE Wallet. If you want to learn how to communicate frontend and smart contracts using Universal Provider, check out the next tutorial.